

Intercom is the category leader in customer messaging. It is also, for most SMBs, significantly overpriced relative to the value it delivers. As businesses review their technology spend in 2026, Intercom's pricing structure — which charges per seat plus usage fees that compound as conversation volume grows — is pushing a growing number of companies to evaluate alternatives.
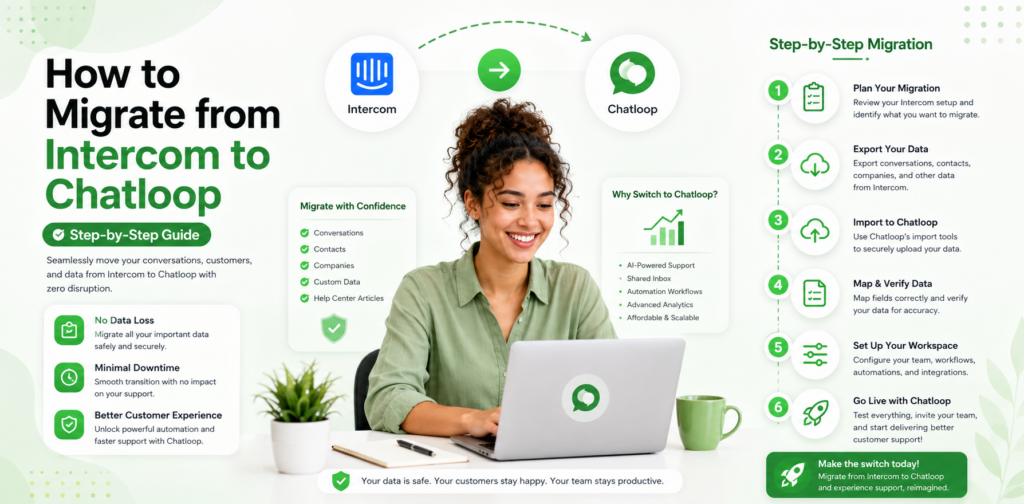
Chatloop.io offers the same core capabilities — AI-powered chat, knowledge base automation, lead qualification, and multi-channel deployment — at a fraction of Intercom's cost for equivalent conversation volumes. This guide walks through the complete migration process: what to export from Intercom, how to rebuild your knowledge base in chatloop.io, how to migrate conversation history, and how to switch over without any downtime.
Why Businesses Are Moving from Intercom to Chatloop
The cost differential between Intercom and chatloop.io widens as your usage scales. Intercom's pricing includes per-seat charges that apply regardless of usage, usage-based AI resolution fees that add up quickly at volume, and premium pricing on features like multilingual support and advanced automation that chatloop.io includes in its base plans.
For a business processing 500 monthly AI conversations, the cost comparison is stark. Review chatloop.io vs Intercom for a detailed breakdown of what you are paying for equivalent functionality on both platforms.
Beyond cost, the other commonly cited migration motivations are: Intercom's enterprise complexity being excessive for SMB workflows, the no-code configuration of chatloop.io being faster to update, and chatloop.io's WhatsApp integration being more straightforward to deploy.
Pre-Migration Checklist
Before starting the migration, complete this preparation checklist.
Audit your current Intercom usage:
- How many active inbox team members use Intercom?
- What automation rules and workflows are currently live?
- What articles and content live in your Intercom knowledge base (Help Center)?
- What integrations are connected (CRM, helpdesk, e-commerce)?
- What chatbot flows are currently configured?
Identify what needs to be migrated:
- Knowledge base articles (Intercom Help Center → chatloop.io knowledge base)
- Custom bot conversation flows
- Integration connections
- Team inbox assignments and routing rules
Set your migration timeline: Most Intercom-to-chatloop migrations complete in five to ten working days for a standard SMB deployment. Complex enterprise configurations with custom integrations may take two to three weeks.
Step 1: Export Your Intercom Data
Intercom allows data export in several categories.
Export conversation history. In your Intercom admin panel, navigate to Settings > Data Export. Export your conversation history as a CSV file. This preserves a record of all previous customer interactions for reference, though chatloop.io will start a fresh conversation history from go-live date.
Export knowledge base articles. Navigate to the Help Center section of Intercom. Articles can be exported as HTML files. For each article, you will need to review, edit, and reformat content for upload to the chatloop.io knowledge base. This is also an opportunity to audit the accuracy of your existing content.
Document your active chatbot flows. Screenshot or transcribe your current Intercom chatbot conversation flows. These need to be recreated in chatloop.io's conversation builder. This step is an opportunity to simplify and improve your flows rather than replicating them exactly.
Document your routing rules. Record how conversations are currently assigned to team members — by topic, language, customer tier, or other criteria. These rules will be reconfigured in chatloop.io's routing settings.
Step 2: Set Up Your Chatloop.io Account
Create your chatloop.io account and complete the initial configuration before starting the knowledge base migration.
Configure your brand settings. Set your chatbot's name, avatar, greeting message, and colour scheme in the chatloop.io dashboard. Your customer-facing branding should match your website and existing communication style.
Add your team members. Invite your inbox team members to chatloop.io and assign appropriate permissions. For detailed plan and user management information, see chatloop.io plans.
Configure your availability settings. Set your team's working hours so the AI handles out-of-hours queries appropriately and escalations are routed correctly. This mirrors the availability configuration you had in Intercom.
Step 3: Rebuild Your Knowledge Base
This is the most time-intensive step of the migration, and the most important. Use your exported Intercom Help Center content as a starting point, but do not upload it directly without review.
Review and update each article. Content that has not been reviewed since it was written often contains outdated information. Migration is the right time to refresh your knowledge base, not just move it. For best practices on structuring knowledge base entries, see how to train an AI chatbot with company data.
Prioritise your top 30 articles. Start with the content that covers your highest-volume queries. Get these live and validated first. Secondary content can be added in the weeks following go-live.
Add direct Q&A pairs for your most common queries. Beyond article-format content, add explicit question-and-answer pairs for your top 20 customer queries. These produce the most consistent AI responses and should be your first knowledge base priority.
Upload in organised batches. Group related content together and upload by category — all returns-related content, then shipping, then product-specific content. Organisation at this stage makes quality review and future maintenance significantly easier.
Step 4: Recreate Your Conversation Flows
Rebuild your Intercom chatbot flows in chatloop.io's conversation builder. Use your documented flows from Step 1 as reference, but treat this as an opportunity to improve.
Simplify where possible. Complex flows with many branches often developed incrementally in Intercom without anyone reviewing the whole. A fresh rebuild frequently produces a simpler, more effective flow. Remove branches that addressed edge cases you rarely see in practice.
Add lead qualification logic. If your Intercom chatbot was not doing lead qualification, add this capability in chatloop.io. For guidance, see AI lead qualification for customer support.
Test each flow with real query variations. Before going live, test every conversation flow with at least five real query variations. Confirm that the AI reaches the correct outcome for each variation and escalates correctly when it should.
Step 5: Configure Integrations
Reconnect the integrations that your current Intercom setup depends on. Review chatloop.io's integrations library and identify the connection for each system you need to link.
For standard CRM and helpdesk integrations, chatloop.io's pre-built connectors handle the connection without technical setup. For custom or niche integrations, webhook connections provide a flexible alternative.
Test each integration in a staging environment before going live. Specifically:
- CRM integration: verify that new conversations create/update contact records correctly
- Order management integration: verify that order status lookups return accurate data
- Calendar integration: verify that booking slots display correctly and that bookings create calendar entries
Step 6: Test Before Going Live
Run a parallel testing period of three to five days before switching over. This involves keeping Intercom active while testing chatloop.io with a sample of real queries.
Internal test team. Have your customer support team use chatloop.io to answer queries for one to two days, comparing responses to what Intercom would have provided. Flag any gaps in knowledge base coverage.
Beta customer group. If your Intercom configuration allows it, redirect a small percentage of new conversations to chatloop.io for real-world testing. Monitor these conversations closely and resolve any configuration issues before full cutover.
Step 7: Go Live and Retire Intercom
When testing confirms chatloop.io is performing correctly:
- Install the chatloop.io chat widget on your website (replace or alongside the Intercom snippet)
- Redirect your WhatsApp Business number to chatloop.io if applicable
- Brief your support team on the new interface
- Monitor closely for the first 48 hours, with team members available to handle any edge cases
Most businesses can complete the widget swap in under 15 minutes. Intercom can be kept on a cancelled but not deleted account status for 30 days as a safety net before full termination.
What Changes After Migration
Cost. For most SMBs, the Intercom-to-chatloop migration reduces monthly spend by 50–65% for equivalent functionality. Review the chatloop.io plans page for current pricing.
Configuration speed. Chatloop.io's no-code interface allows faster knowledge base updates and flow changes without navigating Intercom's more complex admin structure.
WhatsApp integration. Chatloop.io's WhatsApp deployment is simpler to configure than Intercom's equivalent. For businesses that want to extend to WhatsApp, this is a frequently cited advantage.
Reporting. Chatloop.io provides automation rate, response time, and CSAT reporting through the dashboard. For more detailed analytics requirements, review the available reporting features on the features page.
FAQ
Will I lose my conversation history when migrating from Intercom to chatloop.io? Your conversation history stays in Intercom's exported CSV files and is available for reference. Chatloop.io starts a fresh conversation history from go-live. Most businesses find this is not a significant issue, as historical conversations are rarely referenced after the first few weeks.
How long does the migration take in total? A standard SMB migration takes five to ten working days from starting the export to going live. The most time-consuming step is rebuilding the knowledge base — typically two to three days depending on content volume.
Is there any risk of customer support downtime during the migration? No. You run chatloop.io in parallel with Intercom during testing, and the final switchover involves a widget swap that takes under 15 minutes. There is no period during which customers cannot reach support.
Do I need a developer to complete the migration? No. The entire migration — export, knowledge base rebuild, integration setup, and widget installation — is completed through the chatloop.io dashboard and a simple website widget snippet. No coding is required.
What if I have custom Intercom features that chatloop.io does not have? Review the chatloop.io features page against your current Intercom usage. For features that are business-critical but not available in chatloop.io, note these as migration considerations and raise them with the chatloop.io team before committing to migration.
Ready to reduce your support platform cost by 60%? Start your free chatloop.io trial and see why businesses are making the switch from Intercom.

Comments are closed.